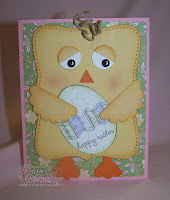
Showing posts with label The Big Shot. Show all posts

Friday, July 23, 2010

Finally Friday at Convention, Oh My!!!!!


My card this week uses the Square Lattice eb folder and Big Shot from SU! I love this folder and my Big Shot!! I also made this card for the LNS weekly challenge 79, which is a sketch, designed by Mary Jo Price-Williams.

I turned the sketch vertical since my card base, Whisper White, was already cut in the vertical way. My top note layer was cut in Tangerine Tango and Whisper White, layered with Pear Pizazz and Greenhouse Gala dsp. Love the bright, fun and sunny colors of this piece of the dsp.

To mimic the flowers on the dsp, I used the extra large fancy flower punch in So Saffron and Tangerine Tango, put them through the lattice eb folder and then curled up the edges. Hard to see in the photo, but I also peeled the Tangerine petals apart some. The entire flower is on a Daffodil Delight scallop circle, the new 2 3/8" one with dimensionals. The sentiment is from the new hostess level 3 set, Occasional Quotes. This is one set you need!! It is stamped in Tangerine Tango and backed with So Saffron. The petals/leaves are punched from the 2 step bird punch in Cert. Celery. I used the branch and wing as leaves.

The strip under the top note layer is So Saffron with WW, after I ran it through the lattice eb folder. I just love the look this folder gives to card stock. 3 silver 5/8' brads finish off the strip. I used a piece of Old Olive satin to finish the card off with. The top note panel is also up on dimensionals.

Convention is a blast, as usual!!!  Tonight I meet up with some of my UDI friends for dinner and more card swapping!!!

Happy Stamping!!!!!

~~~~Ann~~~

Friday, July 16, 2010

Finally Friday & A Window with a View!!

Hello all!!!  Sorry for being a little late today, but I am sooo excited about leaving for convention on Monday, that my days are all running together this week!  The card I have for you today I created for an Inspiration challenge on LateNight Stampers.  And I my card won!!

I'll start with the Bashful Blue background layer. I attempted to try a technique which uses mesh bagging to create the texture. I had a piece from utensils I bought and just found it today while cleaning!! Anyway, I say attempted because it didn't turn out like I thought it would. I used my brayer, a sponge, the ink pad and then a sponge dauber and just kind of rubbed it over the mesh. The effect on here is fine, but I would have liked it slightly more detailed. I did use Bashful Blue ink.

The main image panel was created using Pacific Point, Bashful Blue and Whisper White. My thought/idea was to give the look of looking out of a window, but necessarily from an inside view. Make sense? Not sure I quite achieved that look, but I do love how this card turned out.

The grass was stamped on Whisper White in Wild Wasabi a couple of times, to create depth. I then sponged Bashful Blue over, with a scalloped oval, to create sky and clouds. The sun was actually a "boo-boo", but it turned out ok. The window frame was created by punching four 1 1/4" squares and running it through the Lattice Square eb folder.

The cone flowers were colored with markers and stamped onto Whisper White. I used Wild Wasabi, Daffodil Delight and Chocolate Chip. LOVE that we now have markers to go with former/new In Colors!!! I then cut them out and popped them up with dimensionals. To create even more depth I purposely curved the stems out some and curled up some of the petals. I then wove them through the linen thread, which is wound around the bottom.

My sentiment is stamped with the new Perfect Punches set, using the Round Tab image and the saying is from Teeny Tiny Wishes. Both of these are done with Pacific Point ink.

The butterflies are cut from the Beautiful Wings embosslit in Pacific Point and Wild Wasabi. The entire main image panel is popped up with more dimensionals. To finish this off I used my distressor tool on the Pacific Point and Whisper White panel. Reminds me of looking at a scene on the beach.


The inside was done with the leftover butterflies, stamped some more grass and layered Bashful Blue, Wild Wasabi dsp and Whisper White together.

Happy Stamping!!!  And to all my UDI friends who will be at convention - I can't wait to see you!!!
 
~~~Ann~~~

Friday, April 30, 2010

Finally Friday with Sun, Flowers and Butterflies!!!


Hello all!!!  I hope you are enjoying a beautiful Friday.  The sun is out and the flowers are blooming here in my corner of Michigan!!!

I want you to look around at your surroundings. What do you see? Is there a picture you have that you have thought many times would make a nice card, or do you have an awesome view from your windows? Whatever may be around your home that gives you inspiration, that is what I want you to use for this week.

My inspiration came from the new "Welcome" mat I recently purchased for my front door. Every time I come home, I look at it and think "That would make a neat card." Well, today I sat down and created it!

I started with a card base of Kraft (soon-to-be Crumb Cake) and layered that with Whisper White and Gable Green. I am trying to use as many retiring colors I can now so I wont have a ton left over come the new catalog year.

Since the mat has white polka dots in the background, I ran my Gable Green layer through the Big Shot with the Perfect Details texture plate. I then colored all of the dots with my white gel pen. They're a little difficult to see on the the Gable Green.

I used another strip of Kraft/Whisper White across the bottom and covered it with a piece of the Melon Mambo polka dotted gg, except I flipped it over. Way too many polka dots! My flower comes from the Pretties Kit and place a large white grommet in the center and filled it with clear chunky and pink fine glitter. I also ran the Melon Mambo pad around the edges of the flower to make it pop a little more.

The butterflies were made with the awesome Beautiful Wings embosslit using Razzleberry Lemonade dsp. And for a little more bling, I added two of the small rhinestones from the Eggcellent Easter Egg kit on my sentiment panel.

Not sure who this will go too, as I have my mother's day card already made, but I do have many friends at work who are mother's!!

Happy Stamping!!!!

~~~Ann~~~
Friday, April 9, 2010

Finally Friday with Pink, Brown & Flowers!!


Hello all!!! How are you this fine Friday? Ask I type this, I am in Harrisburg, PA at the 2nd Annual Remarkable Retreat - Hot City Lights!!! Put on by my upline, Janet Wakeland. Last August was the first retreat and oh what fun we had! I will be here until Sunday and then will head home.

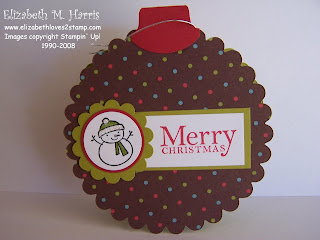
My creation for you is the name tag I made for the SCS 2010 Michigan Mingle. This is an event that is held each year for any Michigan stamper who would like to attend. We have a name tag challenge, among other fun challenges, and this was mine. I even won the contest! How cool is that??? I received a $15 Archivers gift card, which is already gone!!

When I put this together I really didn't have a specific idea and I was putting things together to take with me while I was gone for work.

The scalloped circle is cut from chipboard, using my Big Shot. Boy, that tool can cut through anything!!! I covered it with the Pretty in Pink dsp from the Sending Love speciality dsp in the Occasions mini. Hard to see in the photo, but this dsp has glitter already on it.

The second layer was cut from the Top Note die, from chipboard, creating a medallion from the Top Note. The dsp I used on here is Pink Pirouette (which will be back as a core color in the new 2010 - 2011 catalog!!!) and Sweet Always dsp. The Pretty in Pink strip was in my scraps and I already had embossed it with the Perfect Details texture plate.

I cut my name using the Timeless Type alpha and my Big Shot. You can do so many wonderful things with this gadget. If you don't have one yet, I urge you get one. This layer is popped up with many dimensionals!!!! Didn't want it to fall off.

My ribbon flower was made using Regal Rose gg. I stitched along one edge with linen thread and then pulled it into a circle shape when I finished. After that I just played with it to get the look I wanted. The center is 3/4" circle punched from the same dsp I used on the scallop circle and then a Chocolate Chip epoxy brad in the center. This is popped up on a thicker pop dot. Actually, this flower is really where the idea for the whole name tag started from. I cut leaves with my Little Leaves sizzlet from Kiwi Kiss.

The ruffled ribbon behind the scallop circle is made the same way as my small ribbon flower, but I used the 1 1/4" Pink Pirouette gg and the double stitched Chocolate Chip. Once I had the look I was going for, I adhered it to the back with sticky tape. A length of the Chocolate Chip poly twill served as my lanyard.

Happy Stamping!!!

~~~Ann~~~

Friday, March 19, 2010

Finally Friday with Roses!!


Hello all!! I hope everyone is enjoying a beautiful week as we have here in Michigan. We have been getting a taste of spring and it is wonderful!!!

Our project for today comes from Selene. She used the beautiful Manhattan Roses embossing folder to create a simple, yet elegant card.

Enjoy your day and your weekend!!!

Stamps: Embrace Life

Ink: Versamark, watercolor crayons, bashful blue, ballet Blue, and brilliant blue
Paper: whisper white, and ballet blue

Accessories: Blender Pens (to apply the watercolor crayons) Bashful Blue Silk Ribbon (from the mini)

Big Shot embossing folder Manhattan Flower, Black Embossing Powder, Heat Gun, Powder Pal, Embossing Buddy, Snail Adhesive, 3/16" corner rounder

Happy Stamping!!!

~~~Ann~~~

Friday, March 12, 2010

Finally Friday & All in White!!!


This week we are focusing on the color of white. Now, I don't know about you, but I have a very hard time creating white on white cards. But, last weekend was the VSN weekend on SCS and one of the challenges was to create a card mostly of white. You could add a touch of color, but not too much!

My sample for you this week is that card I created for VSN. I'm actually very happy with how it turned out.

My card base is, of course white. The background panels were run through my Big Shot using the Petals a Plenty and Perfect Polka dots embossing folders. Both of these eb folders are available now!! Once they were put together, I used my distressor tool around the edges. This helps to break up the different layers of white.

The main image panel was punched with the new Scallop Trim border and corner punches now available. The border punch is free with a $50 order during SAB, which ends this month!!!

Once this panel was punched, I stamped my bird, from a A Spring Song, in black staz on. This is a new set for me that I earned during SAB!!! I then watercolored the bird using my aqua painter and ink from the lids of Pretty in Pink, Melon Mambo, Creamy Caramel, So Saffron, Apricot Appeal and Sahara Sand. Watercoloring is not one of my strong areas, but I like how this turned out.

I wrapped the white satin organdy around the end, secured it with a crystal rhinestone brad and added the leaves. You can't tell in the photo but some of the leaves were punched with leftover embossed white and from the Brides dsp.

This whole panel is up on thick dimensionals. And, for me, this is Clean and Simple!!

Happy Stamping!!!!

~~~Ann~~~

Friday, February 26, 2010

Finnally Friday with A Friendly Bird!!


Hello all!!! Sorry I've missed posting the past couple of Fridays. Just really busy and I lost track of the days!!

Ribbon is one of my favorite embellishments to use and I use it often! You can do so many different things with ribbon to create a truly unique card or project.

Here are some ways you can use ribbon on your creations:

* Make ribbon flowers

* Use green ribbon as stems and leaves for flowers

* Make ribbon butterflies

* Use ribbon as a background through "punched windows"

* Use ribbon scraps to create a unique background for your creation

I'm sure there are many more ideas than those I've listed and I would love to hear how you use ribbon!

My idea was to create a "ribbon punched window", but I'm not sure it came out as well as I had envisioned it!!

I started with a strip of Almost Amethyst and used my Boho Blossoms punch for the flowers. Then I took scraps of ribbon from my stash, Old Olive striped and plain gg, White satin, White taffeta and Elegant Eggplant ric-rak. The placement of each of the ribbons was pretty much random and I just put the punched strip over them to see how it looked.

I cut the bird from chipboard with my Birds & Flowers die and covered with Afternoon Tea dsp. I highlighted the wing and beak with a piece of Elegant Eggplant and crystal rhinestone for the eye!

The distressed the edges of the Almost Amethyst strip before attaching. The bird is popped up with dimensionals. The sentiment is from the new set in the Occasions mini: Vintage Vogue.

Happy Stamping!!!!

~~~Ann~~~

Friday, February 5, 2010

Finally Friday and Time to Tie One On!!!


Hello all!!! Did I grab your attention with that title??? This week our creation comes from Adriana Benitez and has she been creative!!!

Here's what she has to say about her card:

I was playing around with ribbon the weekend and was trying to come up with a "different" way to use it. I thought I'd use the wider ribbon and see if I could get it to look like a man's tie. It worked!

I think you could use this for a Father's Day card, Congrats (promotion at work?), Graduation card, etc. But here I wanted to use this Cottage Wall paper so I made a Newlywed card instead. (I was hoping the two rhinestone brads on the top right would resemble earrings....)

Oh - and my hubby deserves some kudos - he held the paper and ribbon in front of him to show me how he ties a tie since I had no clue :)

Stamps: Teeny Tiny Wishes
Ink: Rich Razzleberry
Paper: Cottage Wall Designer Series Paper, Old Olive, Rich Razzleberry,
Orchid Opulence
Other/Tools: Clear Circle Rhinestone Brads, Ice Circle Rhinestone
Brads, Large Oval punch, Movers & Shapers Die, Old Olive 5/8" Satin
Ribbon, Big Shot

What an awesome idea Adriana!!! Need to try this out, but I have no man to help me tie it!! I'll figure it out!!

Happy Stamping!!!

~~~Ann~~~

Friday, January 22, 2010

Finally Friday and Time to Fly!!!


Hello all!!! Here we are at another Friday, which means the weekend is upon us!

The card we have today is from Gretchen Barron and showcases the new butterfly embosslit - Beautiful Wings. This is in the Occasions mini and is a must have!!

Here is what Gretchen has to say about her card:

There's nothing better in the cold of winter than a nice shot of bold, bright colors and beautiful, whimsical butterflies! I used Real Read, Only Orange and Whisper White as my primary colors.

Other colors used for the butterflies include YoYo Yellow, Lovely Lilac, Green Galore and Brilliant Blue. The butterflies are cut and embossed with the new Stampin' Up! Beautiful Wings Embosslet and the Big Shot (available January 5th in the Occasions Mini Catalog).

The ribbon is 5/8" Real Red Satin and the sentiment is from Heard from the Heart. The bottom of the Whisper White layer is punched with the new Scallop Trim Border Punch.

You can find all the details and more photos on my blog at http://gretchenbarron.typepad.com/my_weblog/2010/01/a-new-year-and-a-new-sketch-from-stamping-411.html

Thanks for looking -- blessings, Gretchen

Happy Stamping!!!

~~~Ann~~~

Wednesday, January 6, 2010

Top Note Treasure Box

Happy 1st Wednesday of 2010! 

Today's post is a box created by me.  You can fill it with all kinds of treasures for your Valentine or your kiddos or yourself.  :)  The instructions are posted on my blog.


Amber, no worries.  I'm glad you posted earlier since I didn't get mine up this morning. Wow!  Such a gorgeous card, too!   I can't wait to get my bird punch this Friday so I can CASE it.  ;)

Until next week...
Happy stampin'!

Wednesday, October 28, 2009

Petals-a-Plenty Christmas Tree

Good Wednesday afternoon!  How is everyone this fine day?  I'm great!  Thanks!  Today's blog project comes from (not so) little ol' me!  :)  It's an embossed Christmas tree made from the Petals-a-Plenty embossing folder.  I used the fabulous Patty Bennett's idea from her blog post here.  She is a creative genius!


I cut out a triangle shape using some cardboard packaging I saved from Make-n-Takes at Convention 2008.  I knew I would need it for something.  LOL  One sheet didn't work, so I cut out another triangle and glued the 2 of them together.   That worked perfectly.   I used Shimmery White cardstock and rubbed some Champagne Mist shimmer paint all over the tree.  Then I colored the berries with Real Red.  The star at the top of the tree is punched from YoYo Yellow and also sponged with Champagne Mist shimmer paint then adhered with a dimensional.  This card is so sparkly IRL.  The sentiment is from Four the Holidays and is stamped on Shimmery White in Real Red.  A piece of Soft Suede polka-dot ribbon (I love this ribbon!) finishes off the card. 

Supplies(all SU!):  Stamps-  Four the Holidays.  Ink- Real Red.  Paper- Shimmery White, Real Red, Soft Suede, YoYo Yellow.  Accessories-  Big Shot, Petals-a-Plenty embossing folder, Star punch, Champagne Mist shimmer paint, Soft Suede polka-dot ribbon, dimensionals, sponge dauber.

Until next week...
Happy stampin'!

Friday, October 9, 2009

Finally Friday - The Charming Way!!


Hello all!!  Here we are agin at another Friday!  I, for one, am quite ready for the weekend!

I have to show you the card I made using a fun and quick technique - Poppin Pastels!! Have you tried it yet? You might want to think about it!!!!!


On this card I did double stamping with the versamark and double usage of the chalks. By that, I mean I first stamped the script BG in versamark and went over it with the Pale Plum chalk. Second, I stamped the flower in versamark over the already chalked BG. (See how versatile this technique is?) I then went over the flower with the Elegant Eggplant chalk, carefully so as not to muddy up my colors. The image on the punched circle was colored with the Old Olive chalk and then a second one was stamped and the middle portion was punched out and Pale Plum was used.

I also did another circle medallion with my Top Note die!!! These are addicting!!

This was my card for FS138 who is NancyRuth this week!!! What an awesome gallery she has to see. You really should take a peek.

My card I chose is here: http://www.splitcoaststampers.com/ga...p;ppuser=42694

My changes:

* Colors & stamp set
* Kept the medallion circle, but used a different style
* used pearls instead of brads
* used my SU! texture plates instead of CB folder
* used chalks to color my images

Happy Stamping!!

~~~Ann~~~

Friday, October 2, 2009

Finally Friday Halloween Style!!


Hello all!!! No, I didn't forget to post today!! I am just posting later than usual!


This week we have an awesome Halloween project by Kristine Memmott!  She used the new Cast a Spell dsp and the Big Shot to create a wonderful Treat Holder


Stamps: Batty For You
Ink: Basic Black
Paper: Pumpkin Pie, Basic Black, From the Crypt, Whisper White
Accessories: ¼” Black Grosgrain Ribbon, Dimensionals, Matchbox Die, Scallop Circle Punch, 1 3/8” Circle Punch, 1” Circle Punch


Pillowbox Treat Holder

Stamps: Batty For You
Ink: Basic Black
Paper: Old Olive, Basic Black, From the Crypt, Whisper White
Accessories: 5/8” Black Grosgrain Ribbon, Dimensionals, Pillowbox Die, Scallop Circle Punch, 1 3/8” Circle Punch, 1 1/4” Circle Punch

Happy Stamping!!!!

~~~Ann~~~

Wednesday, July 22, 2009

Fabulous Friend Wednesday...

Pretty lame title, huh? LOL I didn't get anything from the design team for this week, so you're going to have to look at something I made. ;)


I used the Weekend Sketch Challenge for the layout. My card base is Whisper White cardstock. I used a piece of Crushed Curry run through my Big Shot with the Finial Press embossing folder for the background. (I ran the envelope flap through with the same folder for a designer touch.) A strip of Melon Mambo polka-dot ribbon (it's really 2-sided! YAY! I used the solid side.) is adhered across the middle of the card. Melon Mambo cardstock (my fave of the new In Colors) is topped by a piece of Razzleberry Lemonade DSP. The sentiment is from Oval All and the flower is from Razzle Dazzle. I used my In Color markers to color them. I punched it out with the Wide Oval punch (I used a sponge dauber and Crushed Curry to soften the Whisper White cardstock) and layered it on a piece of Rich Razzleberry that was run through my Big Shot with the Lots of Tags sizzlit. The tag piece is adhered with dimensionals.

Supplies(all SU!): Stamps- Oval All, Razzle Dazzle. Ink- Melon Mambo, Crushed Curry, Soft Suede, Rich Razzleberry. Paper- Whisper White, Melon Mambo, Crushed Curry, Rich Razzleberry, Razzleberry Lemonade DSP. Accessories- Big Shot, Finial Press embossing folder, Lots of Tags sizzlit, Wide Oval punch, Melon Mambo polka-dot ribbon.

Enjoy the rest of the week. The weekend is almost here!

Until next week...
Happy Stampin'!
Elizabeth

Wednesday, June 24, 2009

Cherries on top!

Good Wednesday morning! Since I have nothing from the design team to post today, I thought I'd share some projects of my own. ;)

I think these 2 purses are just the cutest. My daughter is actually using the Top Note purse for her cell phone. LOL The directions for the Top Note purse come from UDI's own Becky Roberts and can be found here on her blog. The circle tote was made from 6 inch circles which I cut with my new Circle Scissor Plus. I cut 2 circles from cardstock and 2 from DSP. After I adhered the DSP to the cardstock, I used the tabletop trimmer to cut off just a bit from the bottom so it would stand up on its own. The handles are a Large Oval punch framed by a Scalloped Oval punch. I didn't have any small craft bags for the inside, so I used a Box #2 diecut with the top flaps cut off of it. I embellised the tote with some cardstock and DSP strips, a sentiment, some bling and some ribbon.


Top Note purse: Supplies(all SU!): Stamps- Tart & Tangy. Ink- Chocolate Chip, Old Olive, Ruby Red. Paper- Whisper White, Riding Hood Red, Kiwi Kiss, Rockabilly DSP. Accessories- Big Shot, Scallop Circle die, Top Note die, Scallop Circle punch, Coluzzle (I made this one before Mr. Brown dropped off my new Circle Scissor Plus), Kiwi Kiss ribbon, Pewter jumbo eyelets, Crop-a-dile.


Circle tote: Supplies(all SU!): Stamps- Oval All. Ink- Ruby Red. Paper- Whisper White, Riding Hood Red, Rockabilly DSP. Accessories- Big Shot, Box #2 die, Circle Scissor Plus, Large Oval and Scalloped Oval punches, Ice Circle rhinestone brad, Kiwi Kiss ribbon, dimensionals, Sticky Strip.


Until next Wednesday...
Happy Stampin'!
Elizabeth

Wednesday, June 17, 2009

Wonderful Wednesday!

Happy Wednesday! I have a gorgeous project to share with you all today. It comes to us from Maria Williams, who is also the host of Inspiration Thursdays.

Here is a Pop Up card I was inspired to make from an awesome blog:

http://stampwithheather.typepad.com/stamp_with_heather/2009/04/pop-up-flower-pot.html

I was interested in the pop up cake die, but wasn't ready to spend the money - that was until I saw what else could be done with it. I love being able to utilize my resources in many ways, not just one. There were some other real cute samples made with the pop-up cake die on Heather's blog, too. Let me tell you, I couldn't get my hands on this die fast enough!!!

This is a fantastic Big Shot project - used lots of dies. Now even though I didn't stamp anything on this project, I did sponge ink around each layer of the flower, the butterflies and the greeting section of the card.

Paper: Bashful Blue, Garden Green, Lovely Lilac, Lavender Lace, Really Rust, Chocolate Chip, Apricot Appeal.

Ink: Lovely Lilac, Garden Green.

Accessories: Very Vanilla Wide Grosgrain Ribbon, Scallop Edge Punch, Sponges, Big Shot, Sizzix Dies - Pop Up Cake, Flower Layers, Beautiful Butterflies, Build a Flower #2.

I'll be sure to share my next creation with you all soon!!


Thanks for sharing this one with us, Maria! I can't wait to see what you come up with next!


Until next week...

Happy Stampin'!

Elizabeth

Wednesday, April 1, 2009

No foolin...they're Big Shot Buddies! ;)

Happy April Fool's Day! I hope your day is full of fun!

Today's projects come from the fabulously talented Gretchen Barron. These little guys are fantastic!


Gretchen said: These delightful little Big Shot Buddies are all ready to hop into your life bringing Easter cheer! I used A Good Egg Stamp Set and Tea Party Designer Series Paper along with the Big Shot and the Top Note Bigz Die to create these fun projects!


Bunny -- Top Note Bigz Die and Big Shot, Whisper White CS, Regal Rose CS, Almost Amethyst CS, So Saffron CS, sm. and large oval punches, Wide Oval Punch, Sweetest Stem Embosslet, Flower Embosslet, Rhinestone Brad, Heart to Heart Punch, Natural Hemp Twine, 1/4" and 1/2" Circle punches, Black Stampin' Write Marker, Black Gingham Ribbon, 5/8" So Saffron Grosgrain Ribbon (SAB), Stampin' Dimensionals, Sticky Strip and Mini Glue Dots, White Gel Pen.


Chick -- Top Note Bigz Die and Big Shot, So Saffron CS, Pretty in Pink CS, Whisper White CS, Natural Hemp Twine, 3/4" and 1/4" Circle Punches, Scallop Circle Punch, White Gel pen.

Thanks for sharing these, Gretchen! I can't wait to make my own!
Until next week,
Happy Stampin'!
Elizabeth

Friday, March 20, 2009

Finally Friday with Stephanie!!


Hello everyone!!! No I didn't forget! How could I?? This week our Finally Friday creations come to us from the wonderful Stephanie Gittins!!

Here's what she had to say:

I am ready for spring, and I have found myself using lots of bright, fun colors lately! I love the combination of Pink Pirouette and Tangerine Tango; it reminds me of ice cream! I also had fun playing with the new Texturz Plates for the Big Shot. It's such an easy technique, but I think it really adds an extra "WOW!" to any project. For the flowers, I stamped each layer on Very Vanilla cardstock, and then cut them out and layered them using Stampin' Dimensinals. The pink button was the perfect finishing touch!


Stamps: Petal Pizzazz, Thank You Kindly
Inks: Pink Pirouette, Tangerine Tango, Kiwi Kiss
Paper: Pink Pirouette, Tangerine Tango, and Very Vanilla Cardstock
Accessories: Paper Snips, Stampin' Dimensionals, Button Bouquet, Tangerine Tango 5/8" Striped Grosgrain Ribbon, Sizzix Big Shot, Stampin' Up! Backgrounds I Texturz Plates

These are just gorgeous Stephanie!! Thanks so much for sharing your creativity with us once again!! I agree with you about being ready for spring!!


Happy Stamping!!


~~~Ann~~~

Wednesday, February 11, 2009

Happy Almost Valentine's Day!

Today's project comes to us from Becky Roberts, our Blog Manager. It is absolutely fabulous, and you can order the tutorial on her blog, Inking Idaho.

Thanks for sharing with us, Becky! I am always amazed by your talent!


Have a fabulous Wednesday!
See you next week!

Happy Stampin'!
Elizabeth


Cardstock: Riding Hood Red, Pink Pirouette and Very Vanilla.
Stamp Sets: Loads of Love and Accessories, Love You Much.
Punches: Scallop Circle and 1 3/8” Circle Punch.
Accessories: Candy Lane DSP, Top Note Die Cut and the Big Shot, Transparency Paper, Jumbo Eyelets, Rope Twine, Flower Fusion, Pretty in Pink Taffeta Ribbon, Chocolate Chip Stitched Grosgrain, Button Bouquet.


Wednesday, December 24, 2008

Happy Christmas Eve!


I would like to wish all of you a Merry Christmas! Enjoy the day with your family and friends, and may all your wishes come true!

Supplies(all SU!): Stamps- Merry & Bright, All Holidays. Paper- Kiwi Kiss, Riding Hood Red, Whisper White, Holiday Treasures DSP. Ink- Ruby Red, Old Olive. Accessories- Big Shot, Scalloped Circle die, Scalloped Circle punch, Round Tab punch, 1 3/8" Circle punch, 1 1/4" Circle punch, 2-way glue pen, Dazzling Diamonds, Silver elastic cord.

Holiday hugs!

Elizabeth